Getting started
Speechly’s client library is the part that you integrate to your app or web site. It streams speech from the microphone or other audio sources for analysis and provides an API for reading the results in real-time.
Install and import the client library
Speechly Web Components enable voice input on any web site. At the very minimum, include the Push-To-Talk Button component as it comes with our browser-client library. We recommended adding the following components to the head block of your HTML file for the best user experience:
<head>
  <script type="text/javascript" src="https://unpkg.com/@speechly/browser-ui/core/push-to-talk-button.js"></script>
  <script type="text/javascript" src="https://unpkg.com/@speechly/browser-ui/core/transcript-drawer.js"></script>
  <script type="text/javascript" src="https://unpkg.com/@speechly/browser-ui/core/intro-popup.js"></script>
</head>
Install the client with npm:
npm install --save @speechly/react-client
npm install --save @speechly/react-ui
Import the context provider into your application.
Replace YOUR_APP_ID_FROM_SPEECHLY_DASHBOARD with one obtained from the Speechly Dashboard. If you don’t have one yet, create a new app from any of the pre-made templates. Please deploy it, wait for the deployed status and make a note of the App ID.
// index.js
import React from "react";
import { SpeechProvider } from "@speechly/react-client";

ReactDOM.render(
  <React.StrictMode>
    <SpeechProvider appId="YOUR_APP_ID_FROM_SPEECHLY_DASHBOARD">
      <App />
    </SpeechProvider>
  </React.StrictMode>,
  document.getElementById('root')
);
The Speechly iOS client is distributed using Swift Package Manager, add it as a dependency to your Package.swift:
// swift-tools-version:5.3
import PackageDescription

let package = Package(
    name: "MySpeechlyApp",
    dependencies: [
        .package(name: "speechly-ios-client", url: "https://github.com/speechly/ios-client.git", from: "0.3.0"),
    ],
    targets: [
        .target(name: "MySpeechlyApp", dependencies: []),
        .testTarget(name: "MySpeechlyAppTests", dependencies: ["MySpeechlyApp"]),
    ]
)
Import the client…
import Speechly… and instantiate it in your manager class:
let client: Speechly.Client

public init() {
    client = try! Speechly.Client(
        appId: UUID(uuidString: "YOUR_APP_ID_FROM_SPEECHLY_DASHBOARD")!,
    )
    client.delegate = self
    ...
}
Replace YOUR_APP_ID_FROM_SPEECHLY_DASHBOARD with one obtained from the Speechly Dashboard. If you don’t have one yet, create a new app from any of the pre-made templates. Please deploy it, wait for the deployed status and make a note of the App ID.
The client package is available from our Github repository
Add android-client to your build.gradle dependencies.
dependencies {
  implementation 'com.speechly:android-client:latest'
}
Import the client, as well as the SpeechlyButton.
import com.speechly.client.speech.Client
import com.speechly.client.slu.*
import com.speechly.ui.SpeechlyButton
Instantiate the client in your main activity and add a SpeechlyButton.
Replace YOUR_APP_ID_FROM_SPEECHLY_DASHBOARD with one obtained from the Speechly Dashboard. If you don’t have one yet, create a new app from any of the pre-made templates. Please deploy it, wait for the deployed status and make a note of the App ID.
private val speechlyClient: Client = Client.fromActivity(
        activity = this,
        UUID.fromString("YOUR_APP_ID_FROM_SPEECHLY_DASHBOARD")
)
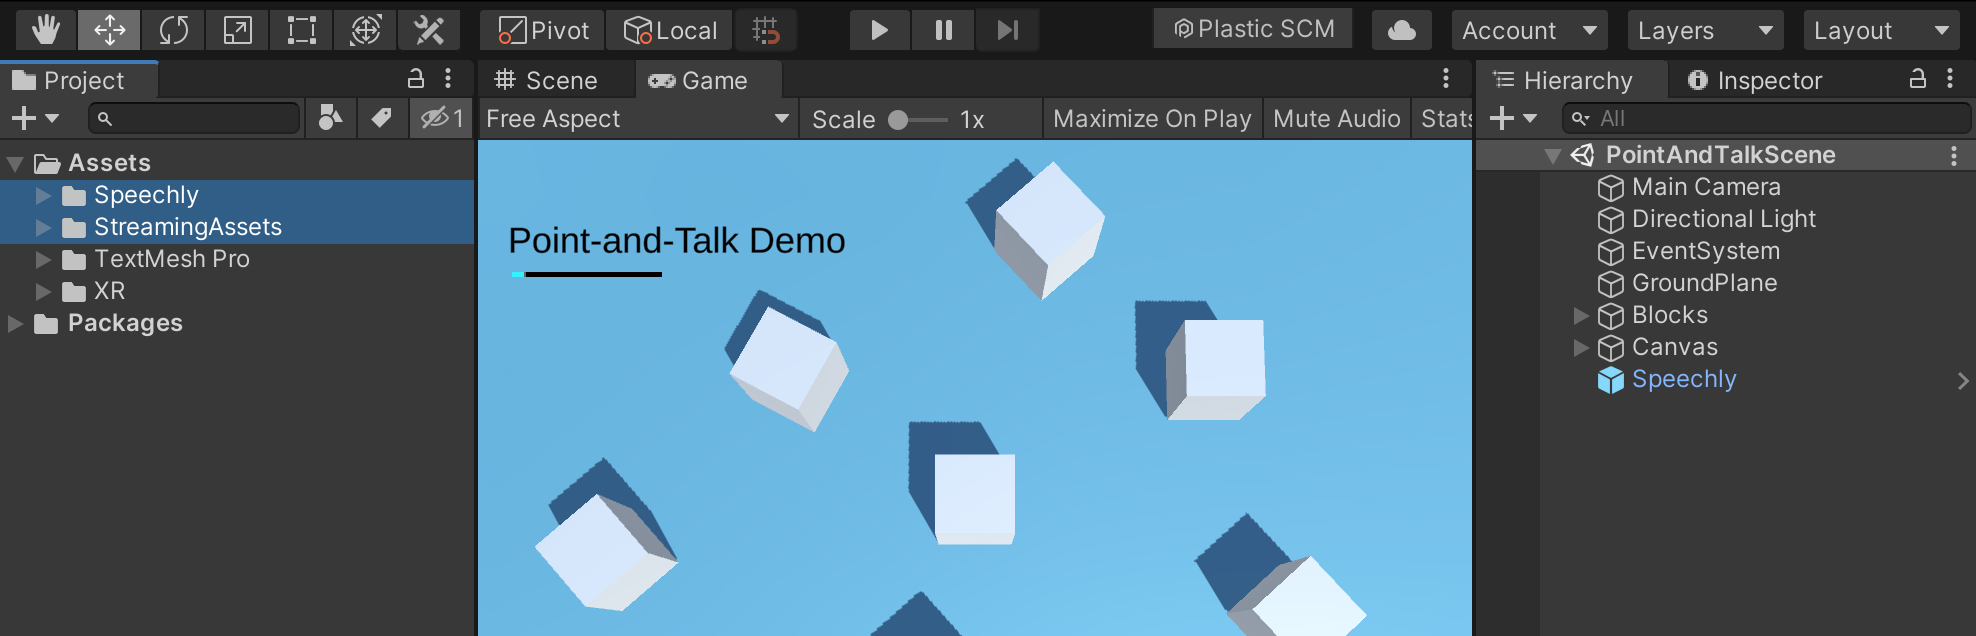
private var button: SpeechlyButton? = null- Download speechly.unitypackage from GitHub.
- Open your Unity Project or create a new one.
- Drag the downloaded package to Unity’s Project window and import
SpeechlyandStreamingAssetsfolders.
Speechly Client requires Unity 2018.1 or later. TextMeshPro (TMP) is required by
Speechly/Examples. Please install TMP if prompted so and restart Unity to refresh TMP component bindings. Unity XR Plug-in Management is required by the VR example.
Take UI components to use
Ready-made UI components start and stop the speech analysis and provide feedback and customizable hints to the user.
Use the imported UI components in your body block:
<body>
  <push-to-talk-button
    appid="YOUR_APP_ID_FROM_SPEECHLY_DASHBOARD"
    intro="Try saying 'Hello'"
    placement="bottom">
  </push-to-talk-button>
  <transcript-drawer
    hint='["Try: Hello", "Try: Hi there"]'>
  </transcript-drawer>
  <intro-popup>
    <span slot="priming-body">
      You'll be able to control the website faster with voice.
    </span>
  </intro-popup>
</body>
Replace YOUR_APP_ID_FROM_SPEECHLY_DASHBOARD with one obtained from the Speechly Dashboard. If you don’t have one yet, create a new app from any of the pre-made templates. Please deploy it, wait for the deployed status and make a note of the App ID.
Import and use the UI components in the App:
// App.js
import {
  PushToTalkButton,
  BigTranscript,
  IntroPopup
} from "@speechly/react-ui";

function App() {
  return (
    <div className="App">
      <BigTranscript placement="top"/>
      <PushToTalkButton placement="bottom" captureKey=" "/>
      <IntroPopup />
      <SpeechlyApp />
    </App>
  );
}
Initialise the TranscriptView and MicrophoneButtonView, and add them in the addViews function of your manager class.
let transcriptView = TranscriptView()
lazy var speechButton = MicrophoneButtonView(delegate: self)

public func addViews(view: UIView) {
        view.addSubview(transcriptView)
        view.addSubview(speechButton)
        ...
}
Implement an extension that maps the microphone button to starting and stopping the client.
extension SpeechlyManager: MicrophoneButtonDelegate {
    func didOpenMicrophone(_ button: MicrophoneButtonView) {
        self.client.startContext()
    }
    func didCloseMicrophone(_ button: MicrophoneButtonView) {
        self.client.stopContext()
    }
}
In your main activity, define a touch listener that activates and deactivates audio transmission. Also, in the onCreate method assign this listener to SpeechlyButton.
private var buttonTouchListener = object : View.OnTouchListener {
    override fun onTouch(v: View?, event: MotionEvent?): Boolean {
        when (event?.action) {
            MotionEvent.ACTION_DOWN -> {
                speechlyClient.startContext()
            }
            MotionEvent.ACTION_UP -> {
                speechlyClient.stopContext()
            }
        }
        return true
    }
}

override fun onCreate(savedInstanceState: Bundle?) {
    ...
    this.button = findViewById(R.id.speechly)
    this.button?.setOnTouchListener(buttonTouchListener)
    ...
}- Locate
Speechly/Speechly.prefabin the Project window. Drag it to the Hierarchy window. - In the Hierarchy window, select the
Speechlyprefab to display its properties in the Inspector window. - In the Inspector window, expand Audio Processor Settings and tick
VAD Controls Listening ✅to enable hands free usage. - Tick
Debug Print ✅to log output to console. - Enter the
App Idobtained from the Speechly Dashboard. If you don’t have one yet, create a new app from any of the pre-made templates. Please deploy it, wait for the deployed status and make a note of the App ID.
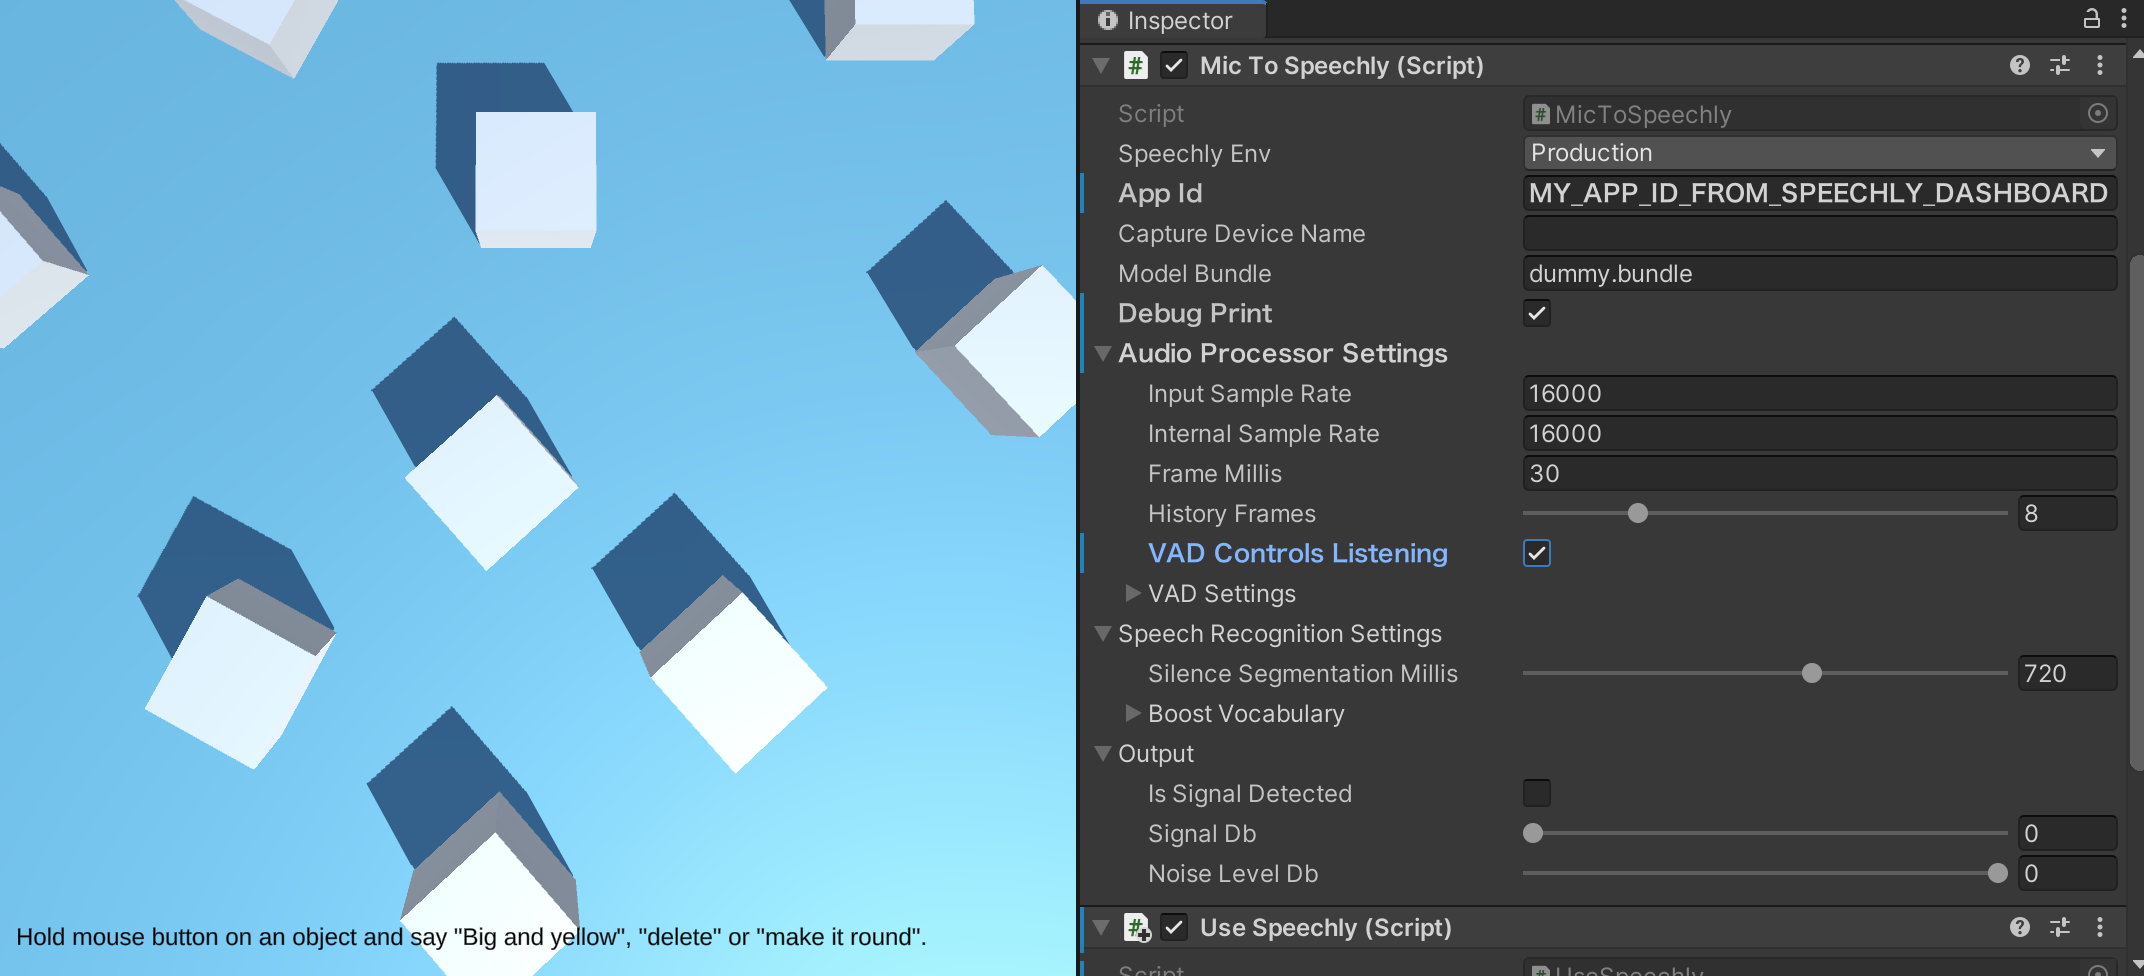
Take it for a test drive
- Hit Unity’s Play button.
- Select
Speechlyprefab in Hierarchly and expand Output in the Inspector window. - Speak and check for live output values for
IsSignalDetectedandSignalDb. If not, move theNoiseGateDbslider in VAD Settings towards -90 dB and check your microphone connections. - Speak and watch the spoken words appear in Unity’s Console window.
Handle speech input
The recommended way to handle speech input is to subscribe changes to the Segment data structure. It is updated several times a second during the speech analysis. It holds all words, intents and entities extracted from the speech segment so far.
Add a speechsegment listener to the push-to-talk-button element:
<script type="text/javascript">
document
  .getElementsByTagName("push-to-talk-button")[0]
  .addEventListener("speechsegment", (e) => {
    const segment = e.detail;
    // Handle speech segment and make tentative changes to app state
    console.log("speechsegment message:", segment);
    if (segment.isFinal) {
      // Handle speech segment and make permanent changes to app state
      // Optionally show confirmation
      window.postMessage({ type: "speechhandled", success: true }, "*");
    }
 });
</script>- A CodePen JavaScript example that changes the HTML background color with voice.
- Check out our browser examples and demos on GitHub.
// SpeechlyApp.js
import { useSpeechContext } from "@speechly/react-client";

function SpeechlyApp() {
  const { segment } = useSpeechContext()

  useEffect(() => {
    if (segment) {
      // Handle speech segment and make tentative changes to app state
      console.log(segment);
      if (segment.isFinal) {
        // Handle speech segment and make permanent changes to app state
        console.log("✅", segment)
      }
    }
  }, [segment])
}
- See Using React Client Library to learn more
- Check out our React examples and demos on GitHub.
Implement the Speechly.SpeechlyDelegate for reacting to recognition results.
extension SpeechlyManager: SpeechlyDelegate {
    func speechlyClientDidUpdateSegment(_ client: SpeechlyProtocol, segment: Segment) {
        // segment handling logic goes here
        ...
        // If you are using the TranscriptView component, also add
        DispatchQueue.main.async {
            self.transcriptView.configure(segment: segment, animated: true)
        }
    }
}
In the onCreate method, define the callback to be used for handling a Segment.
override fun onCreate(savedInstanceState: Bundle?) {
    ...
    GlobalScope.launch(Dispatchers.Default) {
        speechlyClient.onSegmentChange { segment: Segment ->
            // segment handling logic goes here
            ...
        }
    }
    ...
}
For more details, please see our Client API reference, as well as the source code of Segment on Github.
Attach your callback to SpeechlyClient.OnSegmentChange delegate:
MySpeechlyApp.cs
using UnityEngine;
using Speechly.SLUClient;

public class MySpeechApp : MonoBehaviour
{
  void Start()
  {
    var speechlyClient = MicToSpeechly.Instance.SpeechlyClient;
    speechlyClient.OnSegmentChange += (segment) =>
    {
      Debug.Log(segment.ToString());

      if (segment.isFinal)
      {
        // Try adding a phrase with 'stop' as intent in your app id's configuration!
        if (segment.intent.intent != "stop")
        {
          Debug.Log("Great! Anything else?");
        }
        else
        {
          Debug.Log("Bye!");
        }
      }
    };
  }

  void Update()
  {
    var speechlyClient = MicToSpeechly.Instance.SpeechlyClient;

    // Uncheck `Speechly.prefab > Audio Processor Settings > VAD Controls Listening`
    // to enable controlling listening by holding the mouse button
    if (Input.GetMouseButtonDown(0))
    {
      if (!speechlyClient.IsActive)
      {
        _ = speechlyClient.StartContext();
        Debug.Log("Listening...");
      }
    }

    if (Input.GetMouseButtonUp(0))
    {
      if (speechlyClient.IsActive)
      {
        _ = speechlyClient.StopContext();
      }
    }
  }
}
- More Unity examples can be found in
Speechly/Examplesfolder. - Learn more about SpeechlyClient for Unity in Unity API documentation and Speechly for Unity GitHub repository.
Learn more
To get most out of Speechly’s natural language understanding (NLU) features, define the intents and entities relevant to your app in its Dashboard configuration. These will be available to your app via the Segment data structure.
- Learn to configure your own application.
- Speechly Annotation Language (SAL) cheat sheet.
- General client API reference.
Last updated by Ari Nykänen on December 15, 2022 at 13:22 +0200
Found an error on our documentation? Please file an issue or make a pull request